Chicken Run With Covered Walkway
Highlighted under: Everyday Quick Meals Favorites
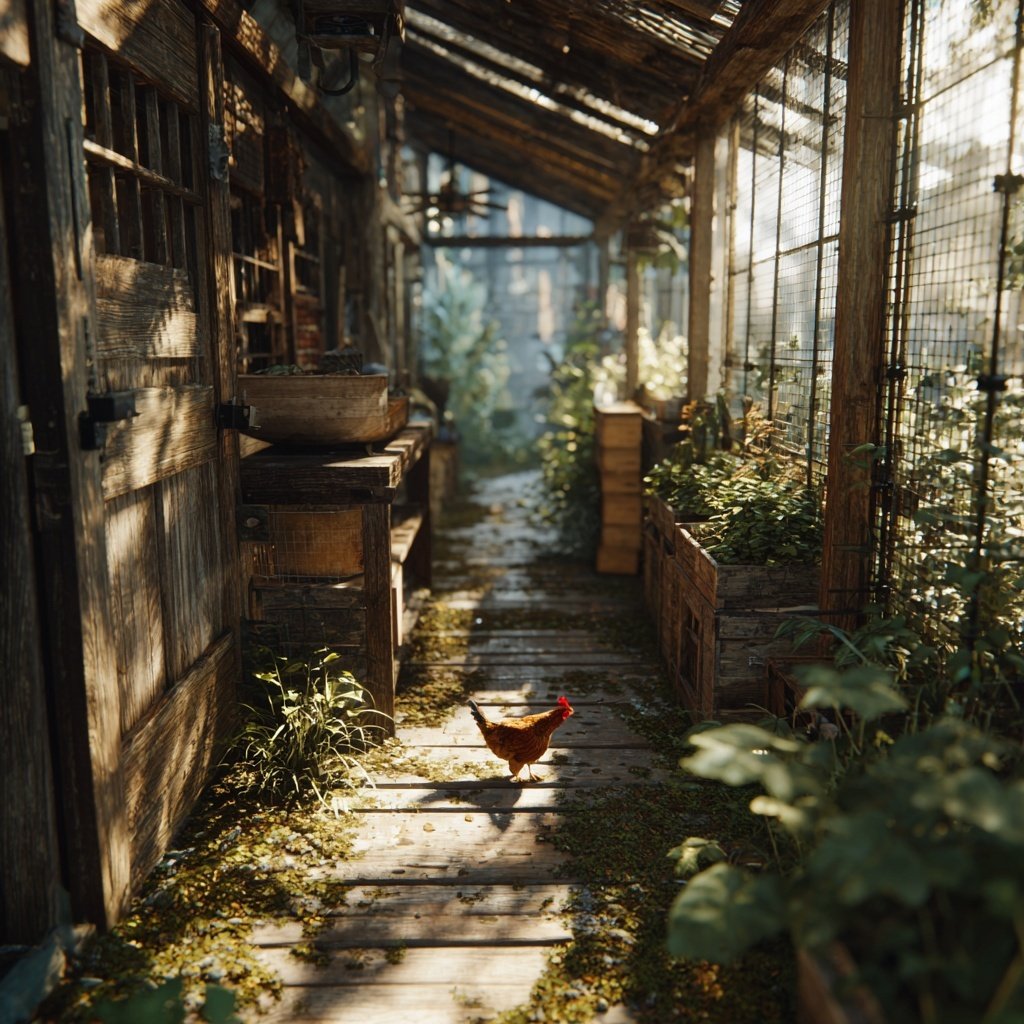
When I decided to build a Chicken Run with a covered walkway, I wanted to give my birds a safe haven while ensuring they could roam freely. Imagine having a structure that provides shelter from rain and sun, making it easier to keep the chickens happy and healthy. I carefully planned the layout and materials to create a practical yet attractive environment. This project didn't just enhance my backyard; it also became a delightful spot for family gatherings, where we could enjoy the charm of our feathered friends without worrying about the weather.


Building the Chicken Run was a labor of love. I meticulously ensured that every inch of the structure was practical yet visually appealing. The covered walkway allows my chickens to explore without getting drenched in rain, and installing proper ventilation was crucial for their comfort.
I also discovered that adding natural elements, like branches and perches, not only beautifies the run but also provides mental stimulation for the chickens. They love hopping around, which keeps them active and healthy!
Why You'll Love This Chicken Run
- Provides essential shelter from harsh weather conditions.
- Enhances your garden's aesthetic while keeping your chickens safe.
- Allows for easy maintenance and monitoring of your flock.
Creating a Safe Environment
Building a chicken run with a covered walkway is not just about aesthetics; it’s about providing your chickens with a secure and comfortable living space. The use of sturdy wooden planks ensures that the structure is robust enough to withstand harsh weather conditions and potential predators. Properly anchoring the wooden posts in the concrete mix is essential to prevent them from shifting or collapsing over time, especially in high winds.
When it comes to the wire mesh, selecting the right gauge is crucial. A 1-inch or smaller opening is recommended to ensure that even the smallest predators cannot enter the run. Additionally, burying the bottom edge of the wire mesh at least 12 inches into the ground will further deter digging animals, providing peace of mind for you and a safe environment for your flock.
Designing the Walkway
The covered walkway serves as a bridge between the coop and the chicken run, ensuring that your birds have a safe passage no matter the weather. Using a durable roofing material, such as corrugated metal, will keep the walkway dry while allowing natural light to filter through, making the area appealing for your chickens. Ensure that the slant of the roof is sufficient to direct rainwater away, preventing any pooling that could lead to rot.
Consider the width of the walkway when designing it; a width of at least three feet not only allows for easy movement but also lets you supervise your chickens comfortably. Additionally, placing non-slip materials on the surface will help prevent any accidents, especially during wet conditions, making the entire environment much safer.
Maintenance Tips
Regular maintenance of your chicken run and walkway is essential for the health of your chickens. Cleaning the run every few weeks helps prevent the buildup of waste and reduces the risk of disease. You can easily use a rake to remove debris and an organic cleaner to wash down surfaces without harmful chemicals. Regularly checking the integrity of the wire mesh is also vital, as any loose edges could pose serious risks to your flock.
In addition to routine cleaning, I recommend doing a complete inspection of the structure at least twice a year. Look for signs of wear or rot on the wooden parts and touch up any paint or stain to maintain weather resistance. If you notice any weakened posts or frames, replace them immediately to ensure the safety of your chickens. This proactive approach will extend the life of your chicken run significantly.
Ingredients
To create the Chicken Run with a covered walkway, you'll need the following materials:
Materials Needed
- Wooden planks (for structure)
- Wire mesh (to keep chickens safe)
- Roofing material (like corrugated metal)
- Concrete mix (for secure posts)
- Hinges and latches (for doors)
- Paint or stain (to protect the wood)
Gather these materials before starting your build to ensure a smooth construction process.
Instructions
Follow these steps to construct your Chicken Run with a covered walkway:
Plan Your Structure
Start by sketching your design on paper, considering the size and location of the chicken run, ensuring it gets plenty of sunlight.
Build the Frame
Use wooden planks to create a sturdy frame for your chicken run. Make sure to secure everything with nails and screws.
Install Wire Mesh
Attach wire mesh securely around the frame to keep predators out while allowing your chickens to see outside.
Create the Covered Walkway
Build a covered walkway using your roofing material. This should connect the coop to the run, enabling protected movement.
Add Finishing Touches
Install a door with hinges and latch for easy access. Paint or stain the wood for extra protection from the elements.
Introduce Your Chickens
Once everything is set up and secure, let your chickens explore their new spacious area!
Ensure you regularly check the structure for any necessary repairs and maintenance to keep your chickens safe and comfortable.
Pro Tips
- Consider adding a small feeding area within the run to keep your chickens convenient access to food and water. This will encourage them to stay active and reduce the risk of spoilage from rain.
Serving Ideas
Once your chicken run is complete, it's a great time to think about how to enjoy the space with your family and friends. I often set up a cozy seating area nearby, allowing us to relax and watch the chickens roam. Having a picnic or beauty spot in the yard enhances family gatherings, providing a storytelling backdrop about the chickens and the care involved in raising them.
You can expand the use of the chicken run area by incorporating decorative elements such as potted herbs or flowers. These not only beautify the space but can also provide additional benefits, such as attracting beneficial insects and adding a lovely aroma.
Storage and Seasonal Adjustments
As seasons change, you may need to adjust your chicken run's setup to keep your flock comfortable. In colder months, consider adding insulation or windbreaks, such as straw bales or tarps, to protect your chickens from harsh winds. Conversely, in the warmer months, providing shaded areas with natural elements like branches or shrubs can help keep your birds cool.
Additionally, storing your chicken feed in a cool, dry place is essential for preserving freshness. A weather-tight container not only keeps pests at bay but also ensures that the feed remains dry and usable. I also recommend keeping a small supply of treats, like dried mealworms, to reward your chickens as you interact with them on nice days.
Questions About Recipes
→ How long does it take to build the Chicken Run?
On average, it takes about 2 to 3 hours depending on your design and materials.
→ What type of chickens can I keep in the run?
Most breeds of chickens can thrive in a covered run, but make sure to provide enough space for each bird.
→ How often should I clean the Chicken Run?
Regular cleaning is advised at least once a week to keep the area hygienic and your chickens healthy.
→ Is a covered walkway necessary?
Yes, a covered walkway protects your chickens from the elements, ensuring they remain dry and comfortable.
Chicken Run With Covered Walkway
When I decided to build a Chicken Run with a covered walkway, I wanted to give my birds a safe haven while ensuring they could roam freely. Imagine having a structure that provides shelter from rain and sun, making it easier to keep the chickens happy and healthy. I carefully planned the layout and materials to create a practical yet attractive environment. This project didn't just enhance my backyard; it also became a delightful spot for family gatherings, where we could enjoy the charm of our feathered friends without worrying about the weather.
Created by: Lauren Mitchell
Recipe Type: Everyday Quick Meals Favorites
Skill Level: Intermediate
Final Quantity: 1
What You'll Need
Materials Needed
- Wooden planks (for structure)
- Wire mesh (to keep chickens safe)
- Roofing material (like corrugated metal)
- Concrete mix (for secure posts)
- Hinges and latches (for doors)
- Paint or stain (to protect the wood)
How-To Steps
Start by sketching your design on paper, considering the size and location of the chicken run, ensuring it gets plenty of sunlight.
Use wooden planks to create a sturdy frame for your chicken run. Make sure to secure everything with nails and screws.
Attach wire mesh securely around the frame to keep predators out while allowing your chickens to see outside.
Build a covered walkway using your roofing material. This should connect the coop to the run, enabling protected movement.
Install a door with hinges and latch for easy access. Paint or stain the wood for extra protection from the elements.
Once everything is set up and secure, let your chickens explore their new spacious area!
Extra Tips
- Consider adding a small feeding area within the run to keep your chickens convenient access to food and water. This will encourage them to stay active and reduce the risk of spoilage from rain.
Nutritional Breakdown (Per Serving)
- Calories: N/A
- Total Fat: N/A
- Saturated Fat: N/A
- Cholesterol: N/A
- Sodium: N/A
- Total Carbohydrates: N/A
- Dietary Fiber: N/A
- Sugars: N/A
- Protein: N/A